Birthday Letter Pillow
I’ve collected a lot of fabric scraps from my sewing projects. Here’s a tutorial for my scrap busting Birthday Letter Pillow. As a birthday gift, I’ll make the first initial of my friend’s name. This project can be adapted for any size pillow and is good for using up scraps that seem too large to throw away but too small to use for sewing a garment or bag, or large scraps with an irregular shape, or pretty cotton scraps that seem too nice to use for pockets.

The letter K with a matching card made from a wallpaper sample
Supplies:
2 big scraps of fabric for the front and back of your letter
A bunch of small fabric scraps at least 4” wide
Batting or stuffing, but you can also use scraps to stuff your letter
Hand sewing needle
Paper to make your pattern
Steps:
Decide what letter you are going to make and draw it on a piece of paper. Add a ½” seam allowance on all sides to make your pattern. I find that it helps if your letter is bubbly with rounded corners, since sharp corners are hard to achieve with this sewing construction.
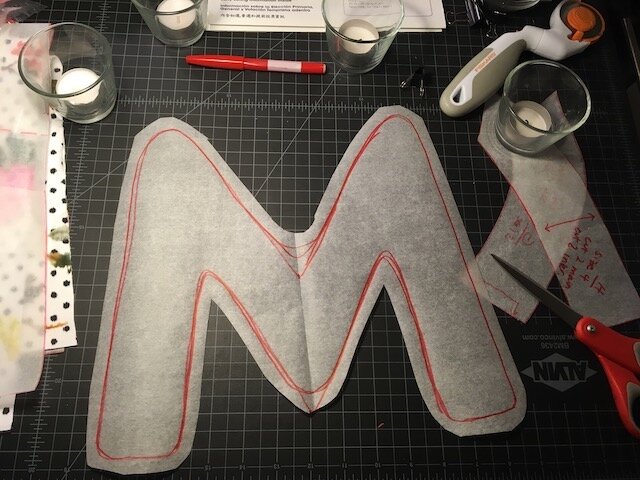
Cut two letters (front and facing) from your fabric. One will be the front, and the mirrored letter will be the back.
Trim your small scraps into 4” wide strips. You will join them together at the ends into a big ribbon. This will be used to create the sides of your letter. If you are making a big pillow (larger than 12” on any side), you may want to increase the width of your side ribbon. Have fun mixing different types of prints and fabric together for a scrappy look! Here I am mixing scraps of quilting cotton, cotton sateen, and lightweight stretch denim.
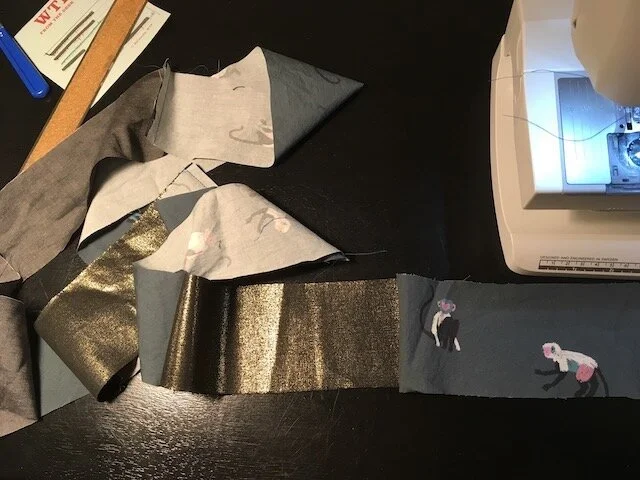
Sew the scrap ends together and iron the seams open to create a continuous 4” wide ribbon.
Next, you will attach the ribbon to the entire perimeter of the front letter. With the right sides of the fabric facing together, align the ribbon with the edge of the letter and sew using a ½” seam allowance. Sew around the entire letter and join the ends of the ribbon together when you reach the starting point. I recommend starting in the middle of a side of the letter rather than at a corner, because it will make it easier to sew together the two ribbon ends.
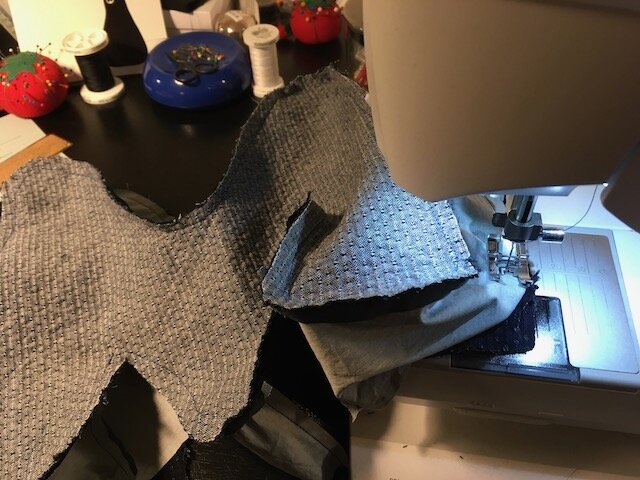
To help the ribbon flow along tight curves, notch the edges of the curve after you sew.
With the right sides of the fabric facing together inside, align the edges and pin the back letter to the ribbon. Sew with a ½” seam allowance and leave a 3” gap on the side where you started.
Flip the letter shell inside out so the right side is now facing out.

Stuff your letter with your preferred stuffing material. Use a pencil to help push the batting into the corners.
Let your stuffed letter sit for a day. You will find that the batting settles over time and there will be more room for stuffing the next day.
Give the letter a second stuff and hand sew the open edge closed.

Complete!