Papercut Emmi Jacket Review

I recently completed sewing the Papercut Emmi Jacket. It is one the biggest sewing projects I have ever undertaken, it took me about two months to complete. I got started the day the pattern was released in early May 2023, beginning with tracing the pattern off of my monitor, and I focused on this project for the past few months.
Why I Chose The Pattern
I went to Paris earlier in the year and picked up a few cuts of quilting cotton from Petit Pan. These geometric prints in complementary neon colors grabbed my attention immediately! I didn’t have a project in mind when I bought these small precut rolls, and it was only later that I thought about making a quilted jacket to showcase these fabrics.
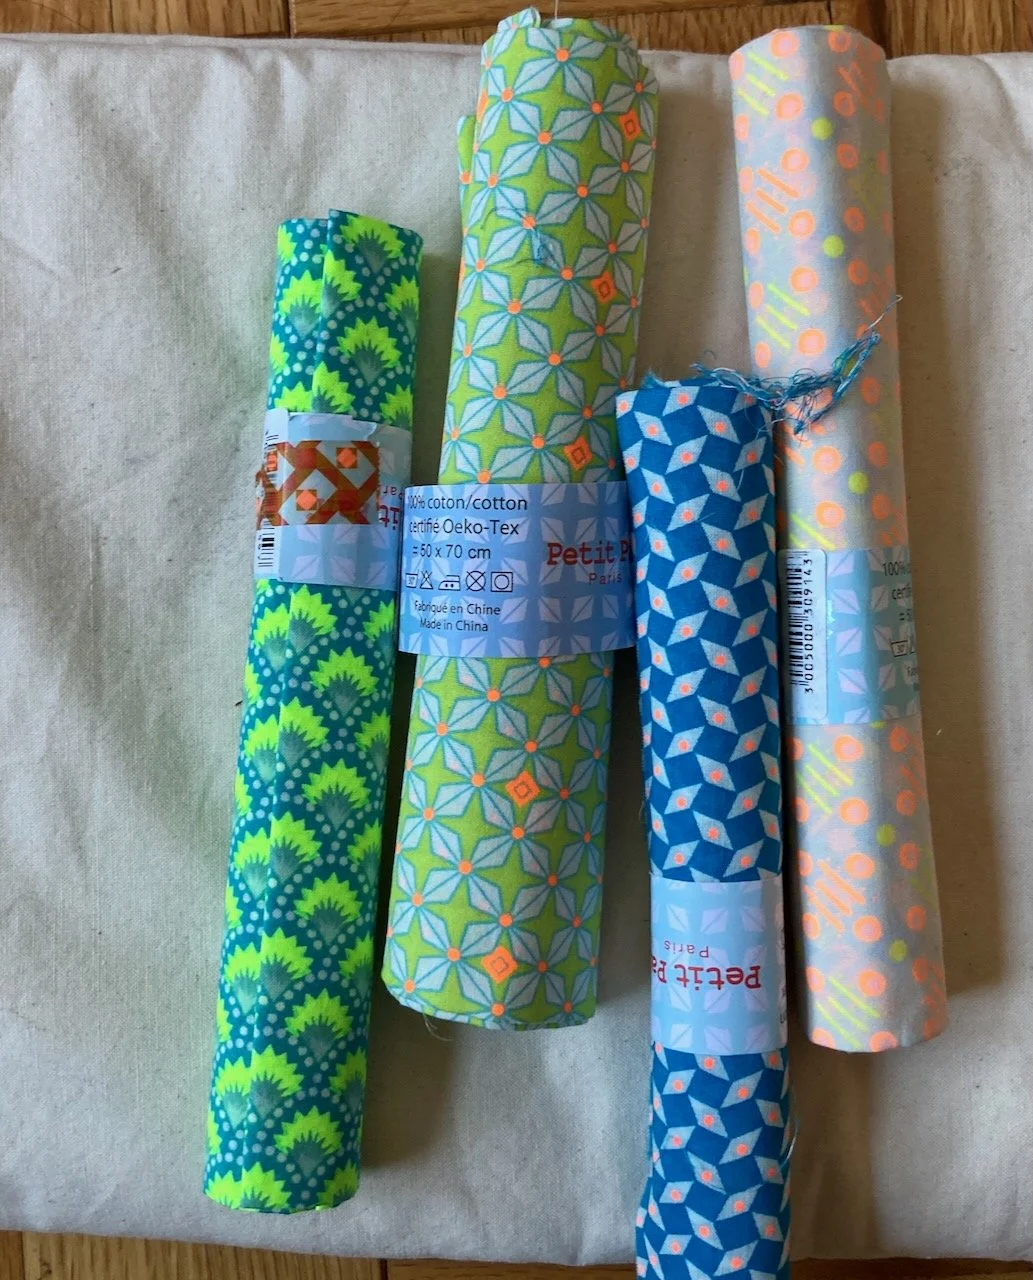
A small batch of colorful fabric is a favorite souvenir from Paris.
I was also thinking about slowing down my sewing and focusing on enjoying the process more. Sometimes I find myself rushing through sewing just to be able to cross the project off of my list, always thinking about the project I would sew next. Having a large project with many steps, like a quilted jacket, would give me plenty of time to get into the making zone and focus on each part of the project.
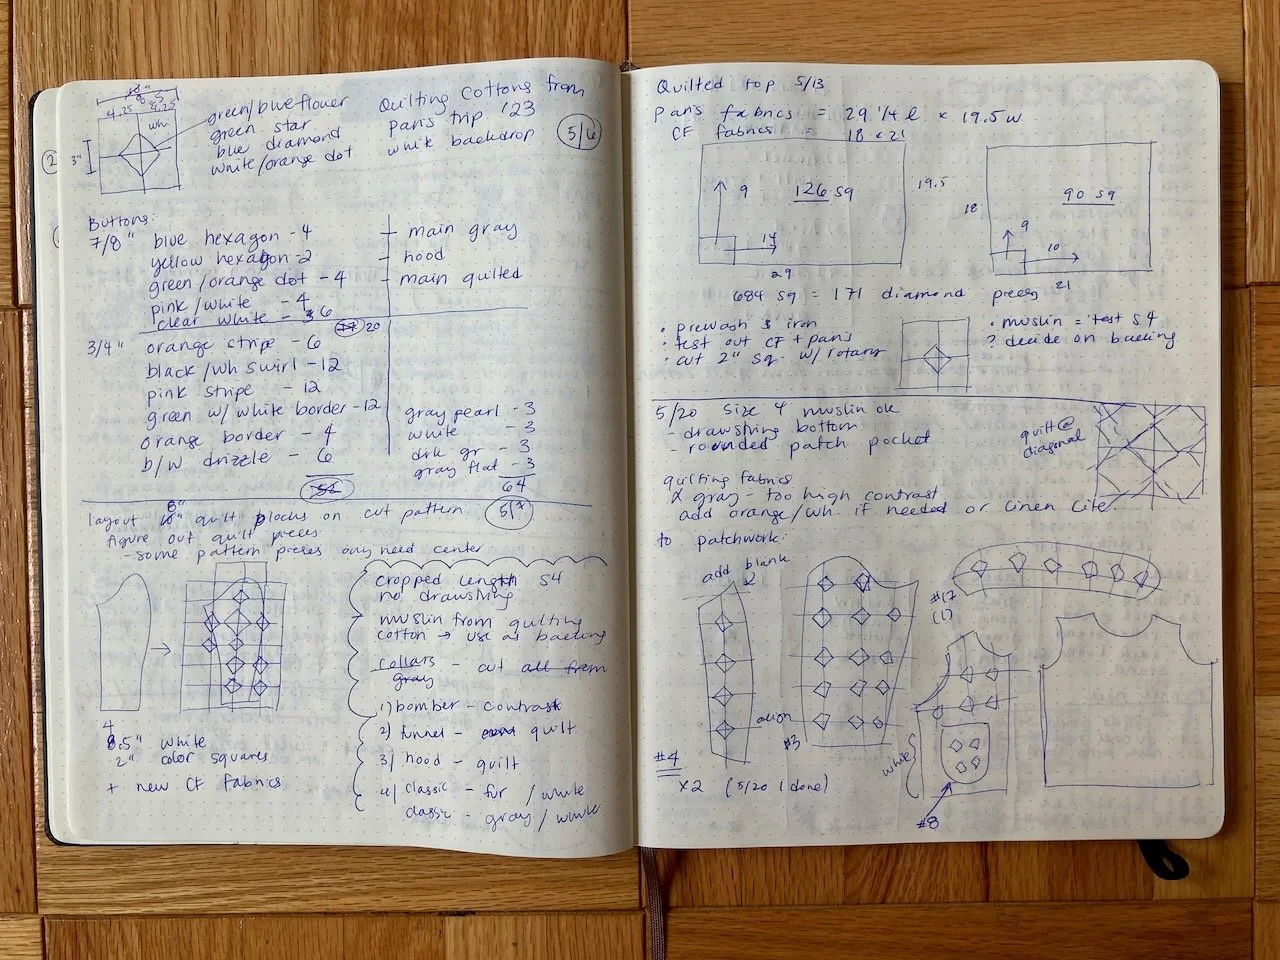
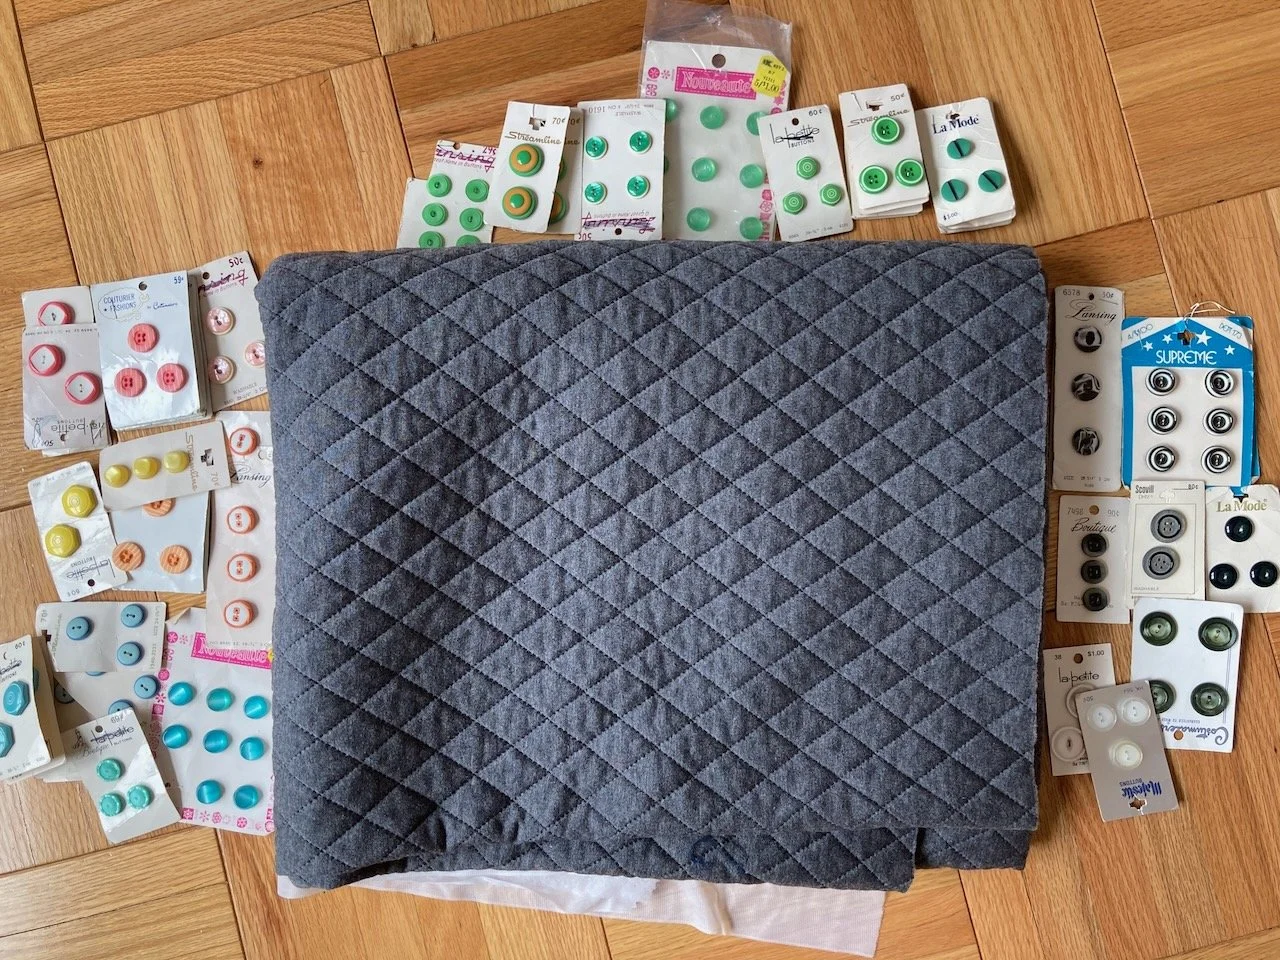
Here is my sketchbook where I planned out the patterning of the patchwork, and made an inventory of my button choices.
Also, I really appreciate the Papercut Patterns design aesthetic. I’ve made the Sierra Jumpsuit three times, and also a couple of versions of the Aura dress and skirt. The company’s modern and slightly dressy style with thoughtful design details fits into my design style, and I always look forward to their new pattern releases. I was also intrigued by the “Advanced” sewing rating associated with the pattern and was up for a challenge.
Finally, I usually sew a coat during the summer. An unusual summer sewing project, sewing a coat lets me luxuriate in the air conditioning when it feels too hot to go outside! A large project like a coat is something to look forward to working on during the longer days with more daylight after work. And starting a project like a coat off season gives me plenty of time to work on it without feeling like I must finish sewing before the first snow.
Patchwork and Process
Choosing a Size
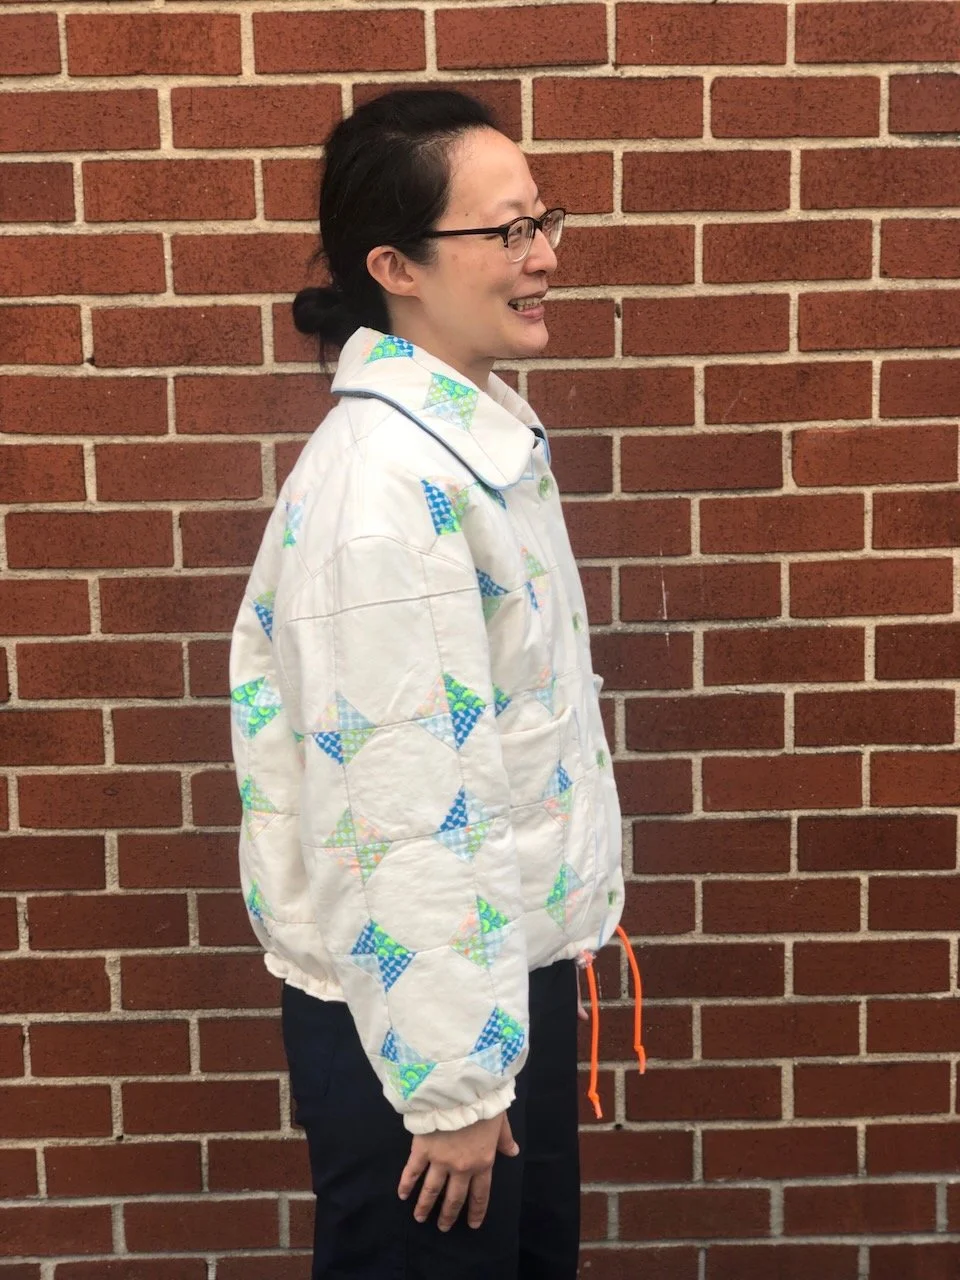
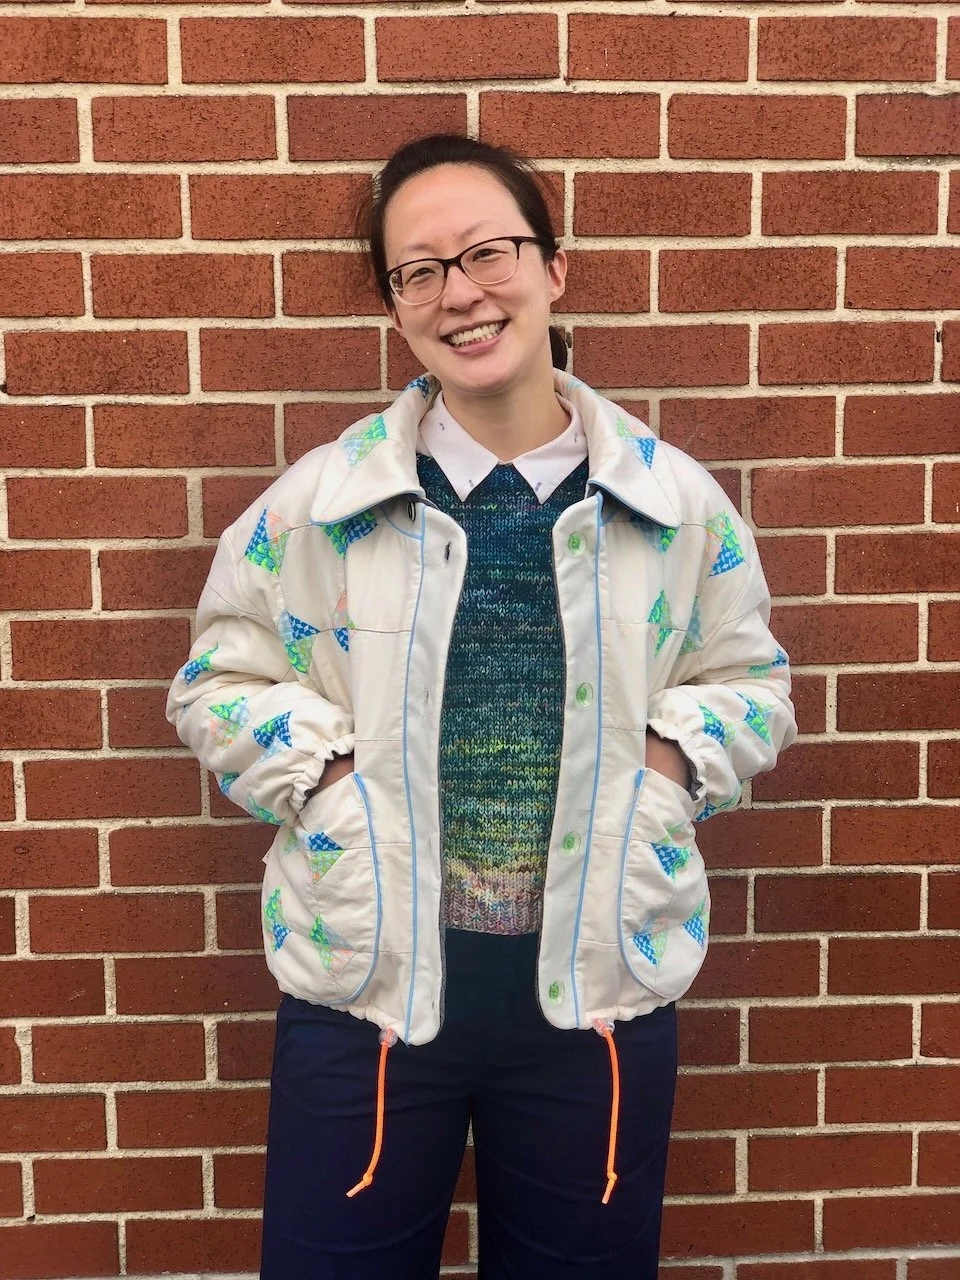
I decided to make a size 4, which was oversize for my measurements. I have enjoyed knitting my own sweaters lately, but I still cannot figure out knitting gauge, and most of my sweaters end up oversized. Now I have adopted the oversize sweater look into my winter wardrobe style. A size 4 jacket would fit over my oversize sweaters, and I double checked by making a muslin. I also went with the cropped, drawstring hem version of the jacket, because I had nothing else like it in my closet.
Patchwork and Fabric Choices
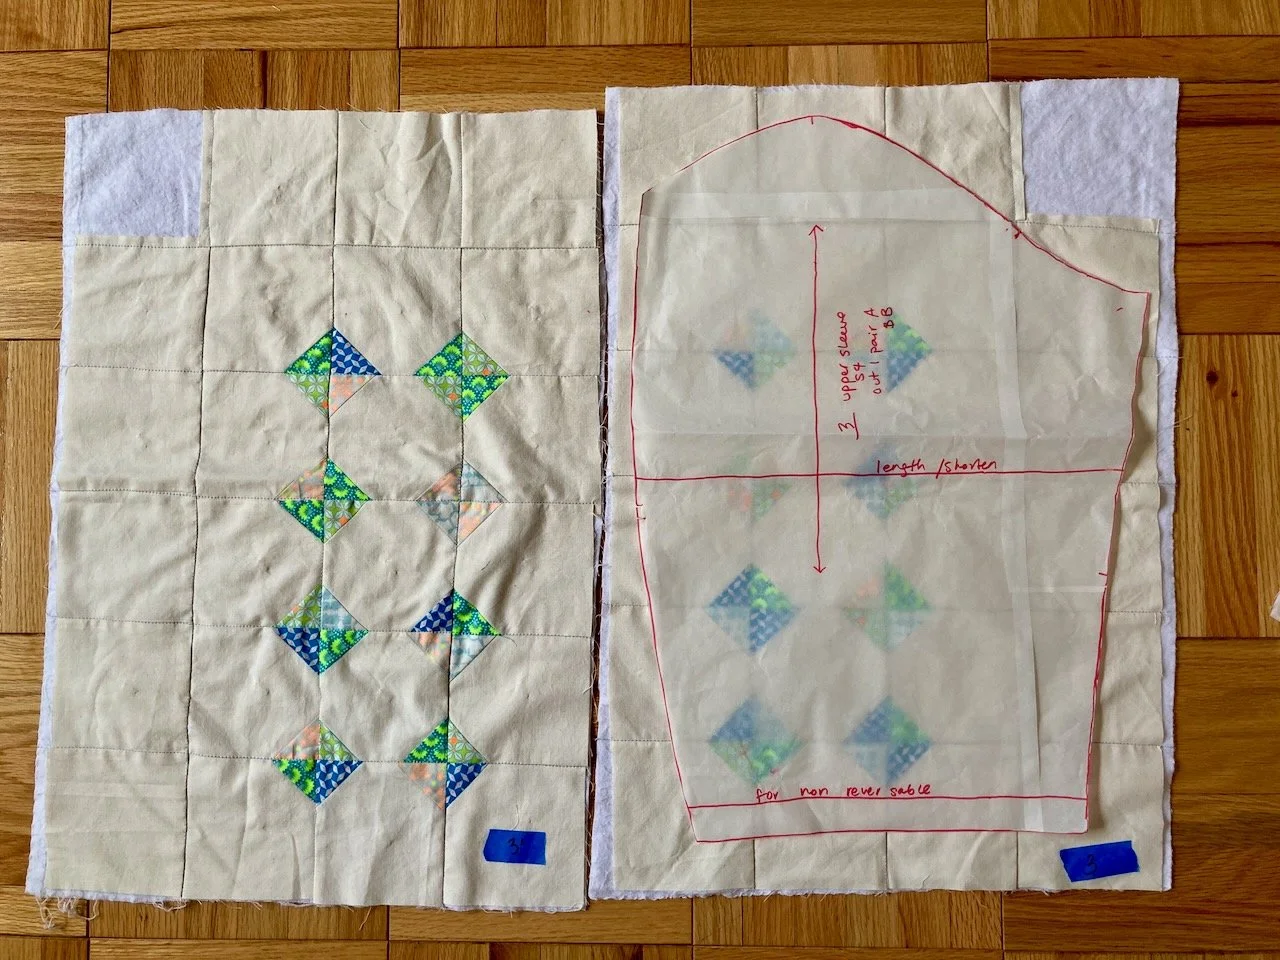
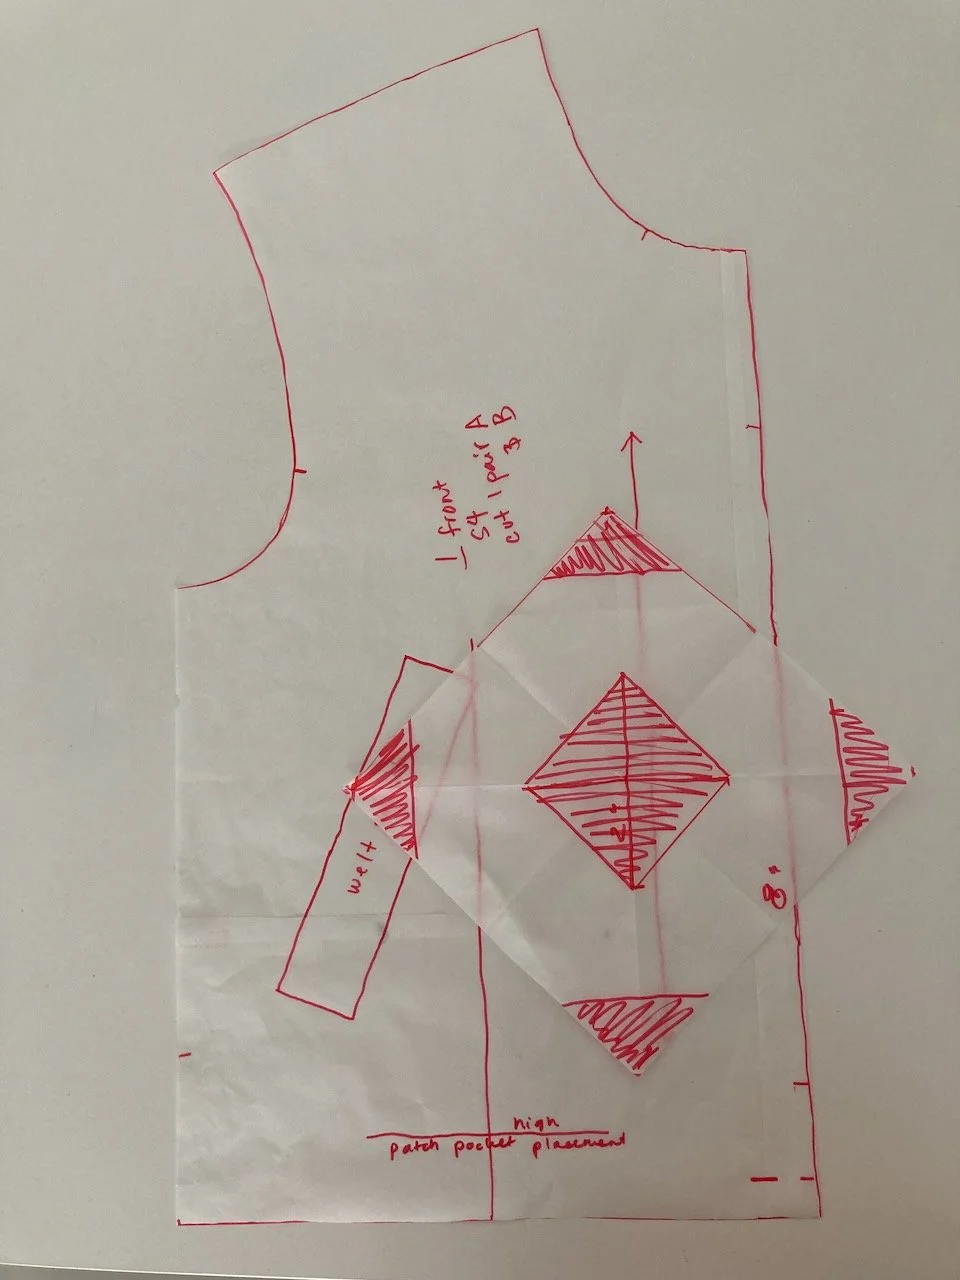
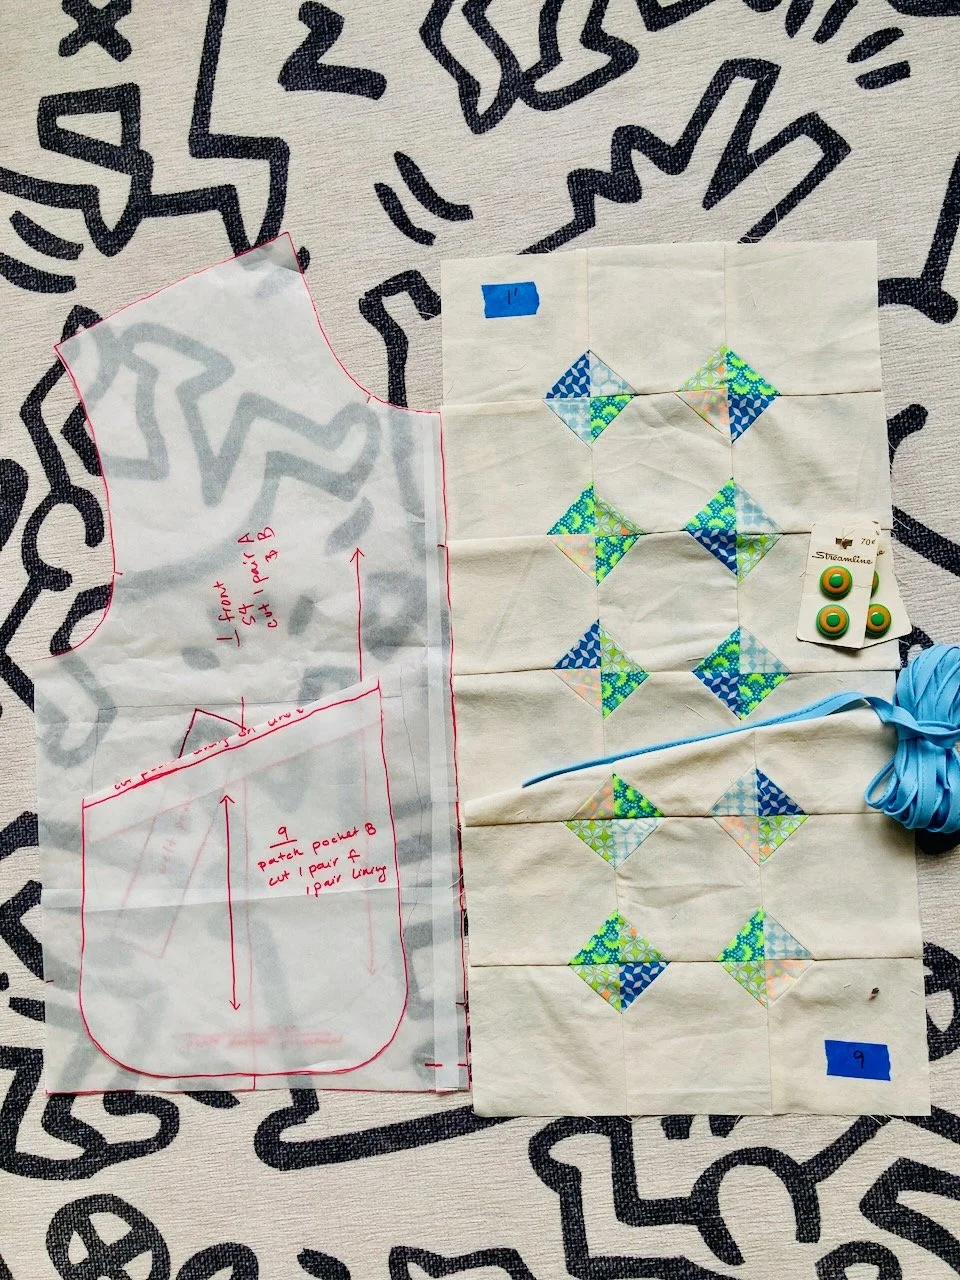
Patchwork was always part of the original plan for my special Paris fabric stash. I liked the simplicity of this quilt pattern, and sewed a few different sizes of quilt blocks to find the preferred proportion of white space for the quilt body. For color balance I also added another quilting cotton cut that I had from my stash. Making little schematic sketches of each jacket piece that I would have to patchwork helped to ensure the quilt blocks wouldn’t get half cut off or covered by a seam when sewn together.
For the reversible side of the jacket, I had a 2 yard cut of one sided gray quilted fabric that I had mistakenly bought for another project, thinking it was double sided. It had been taking up a lot of room within my closet fabric stash, and I was eager to make use of it. I had to do a very tight cutting layout to fit all of the jacket pieces and all four collar pieces onto the fabric but it did fit.
I chose to quilt the patchwork side of the jacket together with a white flannel fabric. This helped maintain the light color appearance of the patchwork side of the jacket, since the white fabric was a little bit see through, and it gave the patchwork fabric more body. However, I was surprised with how thick the jacket became when the patchwork and flannel was paired with the pre quilted gray fabric. This was definitely a winter coat and no longer a fall layering piece.
Notions and Buttons
This was the perfect pattern to showcase some of my vintage buttons!
Finally, after I started putting together the patchwork jacket front, I bought some blue piping to add around the pockets and plackets to make the style lines pop. I omitted the flannel backing from the plackets and collar and was very glad that I did, otherwise the buttonholes would have been more difficult for my machine to make.
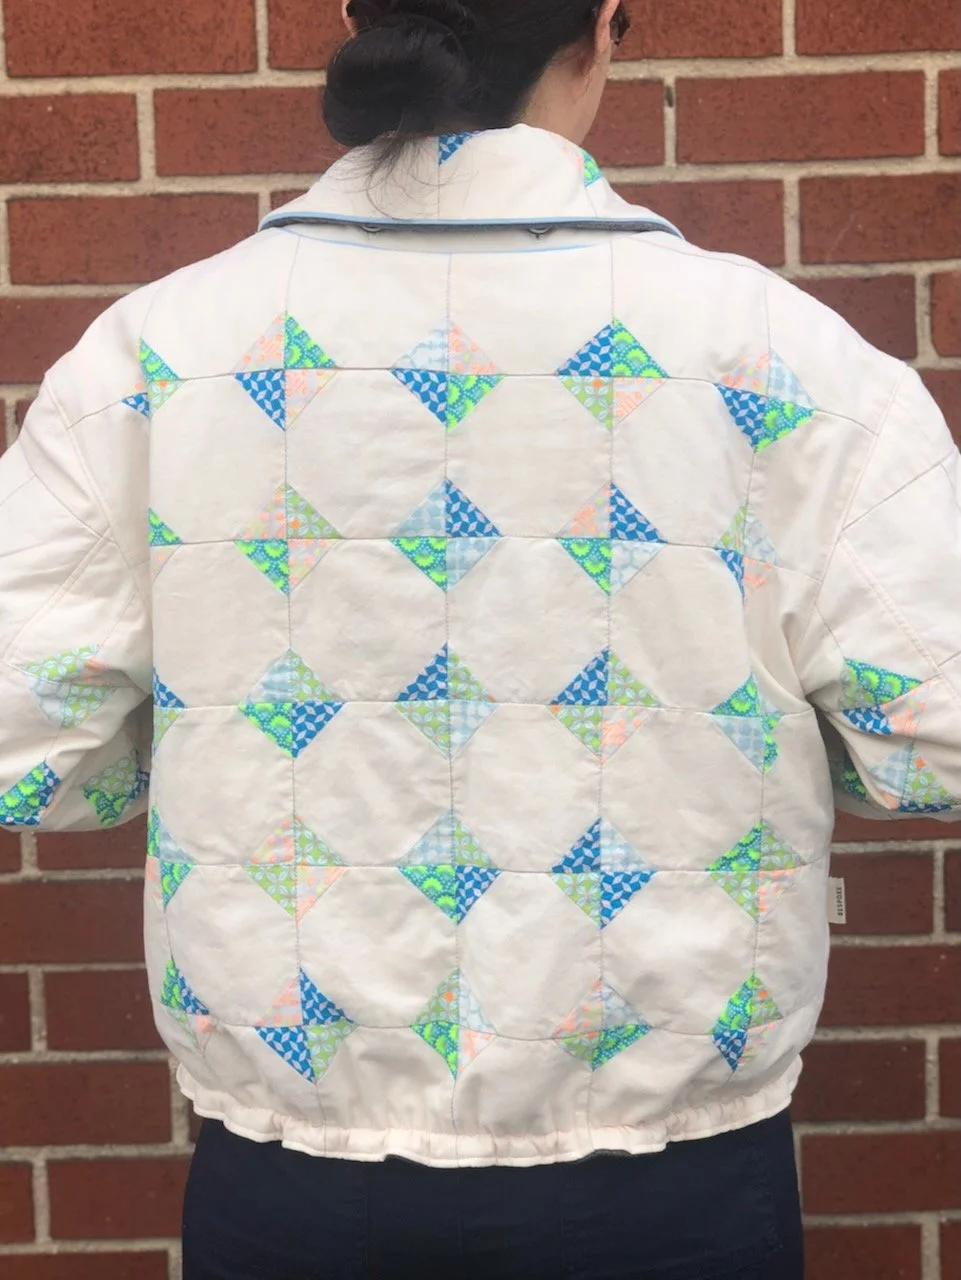
Final Project
I really enjoyed the process of making this jacket! I’m glad that I took my time to plan out the patchwork pieces so they came together as I had envisioned in my sketches. Surprisingly, I also enjoyed cutting out the small blocks for patchwork, which is something that I usually rush through but this time I took my time and thought about my time wandering around Paris and picking out these special fabrics.

I think I could have made a smaller size jacket, but it is hard to tell what the fit will be like when I am dressed in multiple layers and a chunky sweater for winter. It was a hot summer day when I took these photos! I also like the longer hem versions of the jacket, but would not have had enough fabric to make the longer versions.
Tips
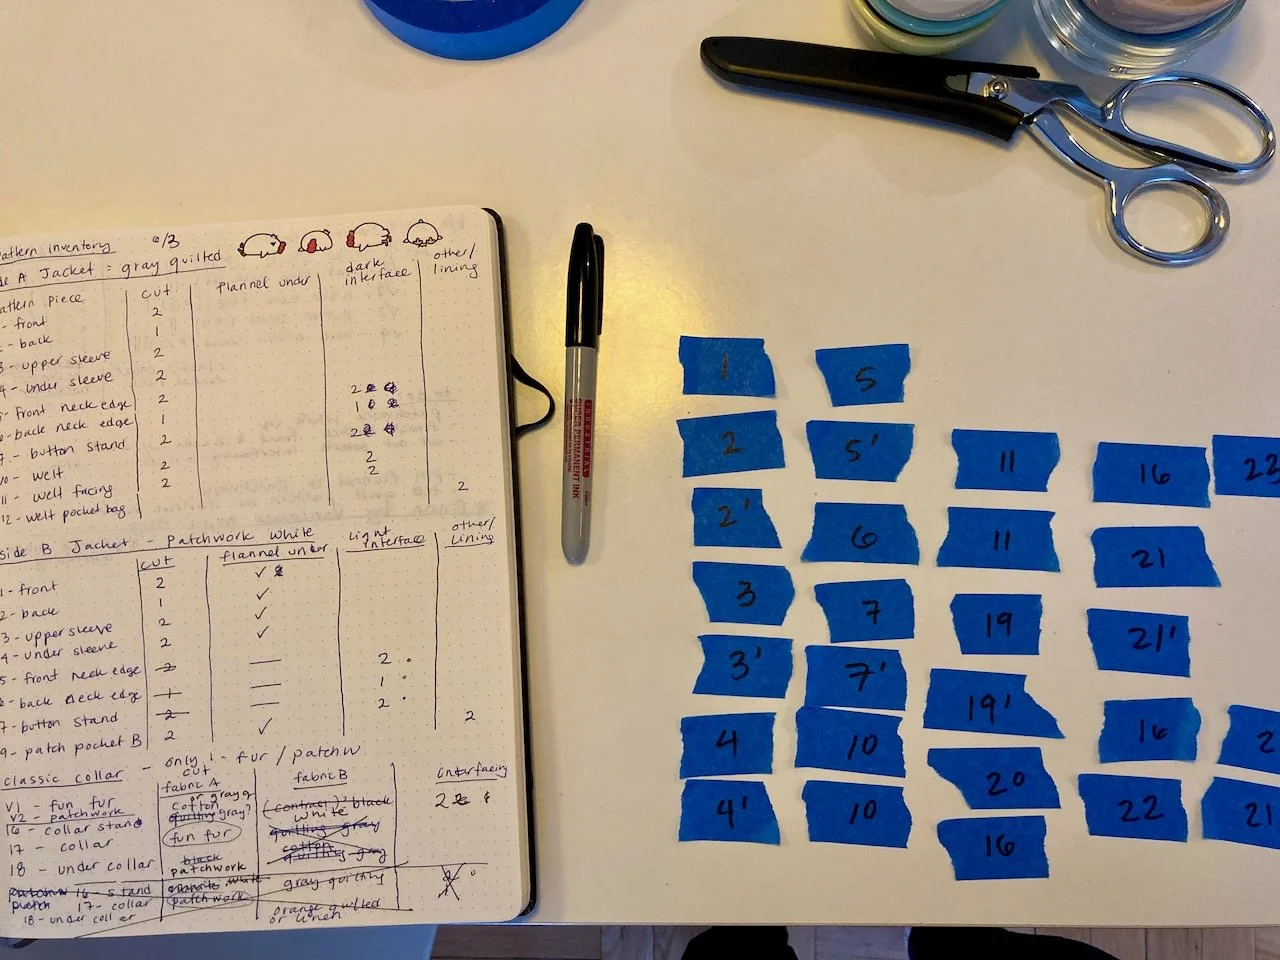
I used masking tape to mark each of my cut pattern pieces.
I recommend making a checklist of pattern pieces before starting to cut out the fabric. When you include the interfacing pieces and all four collar variations, there are almost 100 pattern pieces. Labeling the cut pattern pieces with masking tape is also recommended!
If your jacket fabric is light colored and not totally opaque, you may see through to the dark interfacing from the reversible side of the jacket. Using a light color interfacing on both sides of the reversible jacket will help to avoid this problem. The same thing goes for the welt pocket bags - dark fabrics may show through on the lighter side of your jacket.
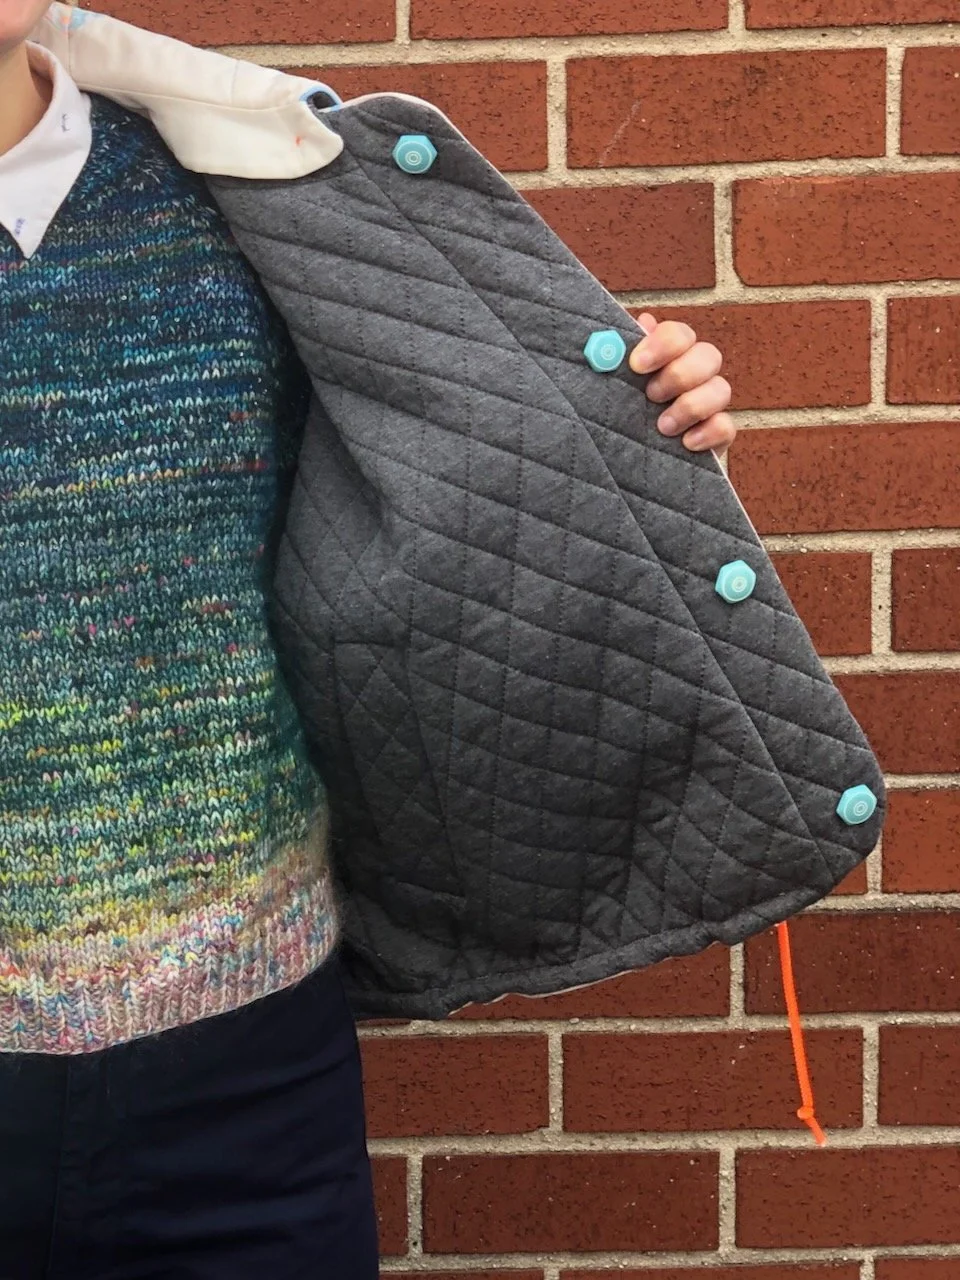
I found that using shank buttons on one side of the reversible jacket and collar provided enough wiggle room to button it up.
Trimming your seams down wherever possible would help to reduce bulk, especially around the collars. I could have trimmed more and would have had an easier time with the collar buttonholes.
I could have spent some time trimming the quilt blocks so the patchwork points would line up better, but the mismatched points don’t bother me when I look at the overall jacket.
This episode of Love to Sew has good tips for sewing a quilted jacket