Tracing Sewing Patterns From Your Monitor
Do you like using digital sewing patterns, but don’t like the amount of paper wasted in printing? Or do you hate the wait for your large format print to arrive in the mail, when all you want to do is sew already? Then this tutorial is for you. I am going to describe, step by step, how to get tracing a digital sewing pattern off of a computer monitor. No printing required!
This can be a somewhat time consuming process, but I find that it saves me the cost of printing and wastes less paper, especially if I am using repurposed paper. If you are curious to try this method out, I recommend starting with a digital sewing pattern that has smaller pattern pieces like the Emerald Erin Black Beauty Bra, the Seamwork Kaye, or the Victory Atlas Mitten.
You will need:
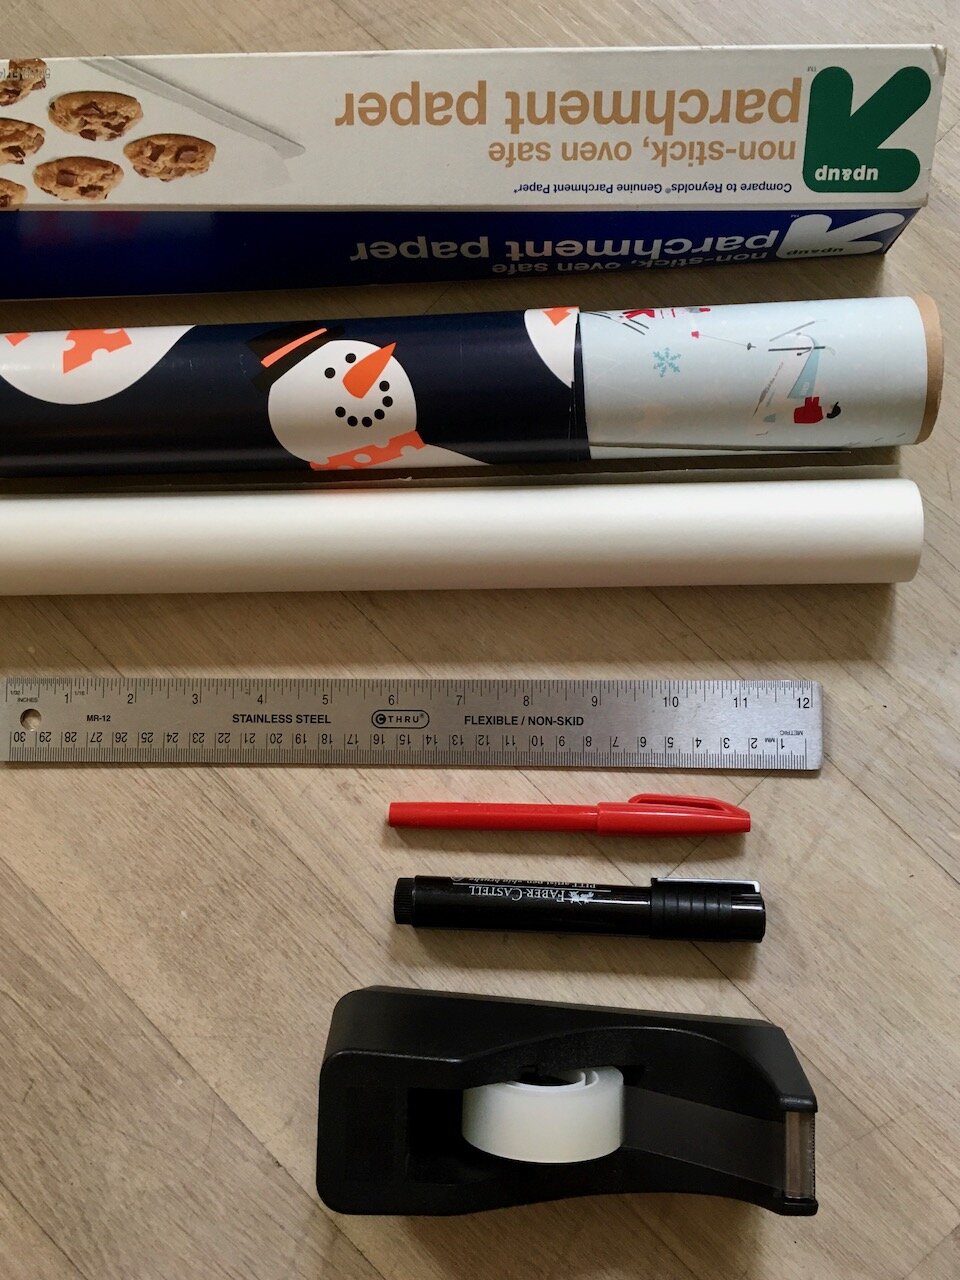
Tracing paper or thin paper you can see through when backlit, like newspaper, wrapping paper or baking paper. Larger sheets are easier to use, though you can also tile together multiple sheets of computer paper
Felt tip washable pen- no sharpies, no ballpoint pens
Tape
A computer monitor or TV, if you are able to hook it up to your computer
Your digital sewing pattern
A physical ruler or a measuring tape
Before you start:
Read through the pattern instructions, take your body measurements, and decide which pattern size and pattern pieces you will need for your project.
I like to only trace the pattern pieces that I need.
If you are between sizes and would like to grade the pattern, you should plan on tracing both sizes you will need as they appear in the nested pattern layout
You can always repeat the tracing process and trace another pattern size, too.
Initial setup:
Download your digital sewing pattern as a pdf,
Open the copy shop (sometimes called the A0 version) in your preferred pdf viewer. If your pattern comes with multiple pdf options, I recommend opening the one where all of the pattern pieces are laid out on a single large spread. Some pdfs may contain multi-page layouts meant to be printed on large sheets of paper, instead of a roll. In this case, the longer pattern pieces like pants legs may be split up onto 2 pages. The pdf that shows the pattern pieces whole will be easier for you to trace off your monitor.
Pdf viewer: I use either Adobe Acrobat Reader or Preview on a Mac computer.
You will also want to pull your computer monitor close to you so your arm can comfortably reach the screen. If you are using a TV, you can set up a chair in front of the screen.
Finding Actual Size:
Find the view scale option in your pdf viewer as a percent of zoom.
I like to start by selecting the option to view “full size” or zoom 100%. Note: this is probably not going to appear as the “actual size”.
From this point on in my tutorial, I will call “actual size” when 4” measured on your monitor equals 4” on your physical ruler. “Actual size” represents when the digital measurements and the physical measurements match.
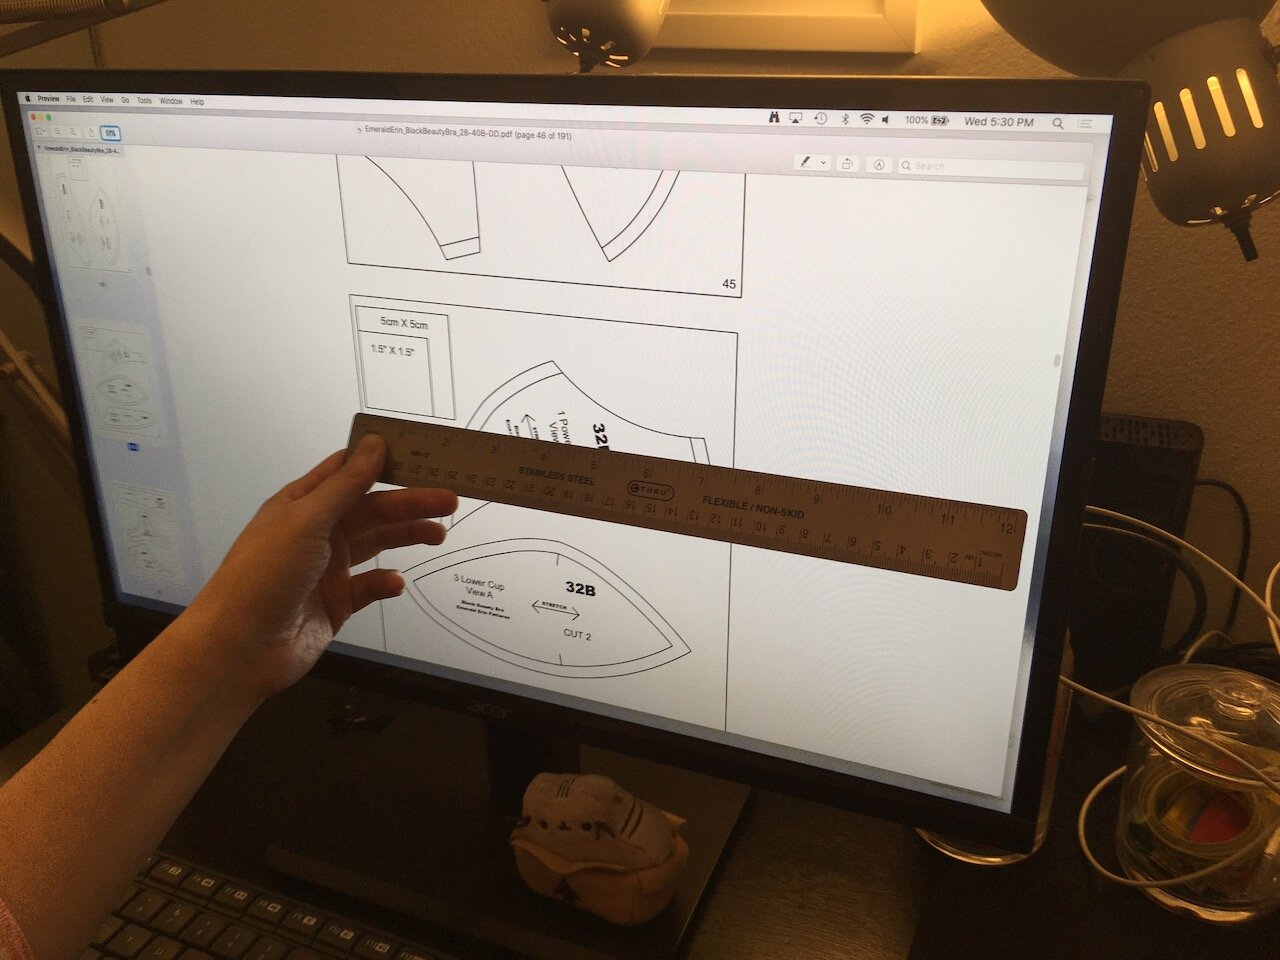
Find the test square box on your pdf pattern. It usually appears near the top of the page and has a written dimension, such as 4” x 4”.
With your ruler, measure the size of the box as it appears on your screen. Yes, you are literally holding your physical ruler up to your monitor and measuring the image on your screen.
If the test square box is larger than the size it is supposed to be (measures > 4”): decrease the scale of your pdf by a few percentage points.
If the size box is smaller than the size it is supposed to be (measures < 4”): increase the scale of your pdf by a few percentage points.
Keep on adjusting and measuring until the test square box dimensions match the dimensions on your physical ruler. Congratulations, you have found the Actual Size!
Test:
Tape a piece of your preferred trace paper onto your monitor.
Trace the test square box.
Remove the paper from your monitor. You may measure, with your physical ruler, the test square box to confirm your Actual Size.
Double check that your felt tip pen is not bleeding through the paper to the monitor or somehow damaging your monitor. You don’t want to watch TV with half a sleeve cap marked on the screen!
Tracing the Pattern - for smaller pieces:
Now you are ready to trace! I like to start from the smaller pieces that fit completely on the monitor in actual size, like pockets and waistband halves.
Tape your paper to the monitor so the paper covers the entire pattern piece you are tracing.
Trace the pattern outline in the size that you need. Don’t forget to trace the notches, markings, and grainline, and label your pattern piece.
Remove the taped paper and cut out your pattern piece. Save the larger paper scraps for future use.
Tracing the Pattern- for larger pieces:
Larger pattern pieces like pants legs will not fit onto your monitor all at once. You will need to scroll down to see the entire pattern piece. To trace these pieces I have come up with a method that I like to call Draw A Rectangle. Draw A Rectangle helps you to trace your larger pattern pieces with less distortion. This method involves making digital registration marks so you can move and align your pattern piece as you scroll through the pdf.
Draw A Rectangle method:
Find the draw or markup function in your pdf viewer.
Draw a large rectangle on the digital pattern pdf. This rectangle does not need to fit within the bounds of the pattern piece, but it should be fully visible on your screen without scrolling.
Trace as much of the pattern as you can see on the monitor right now. Also trace the corners of your rectangle.
Remove the paper from your screen.
Scroll down a little, stopping when the bottom half of the rectangle is still visible on your screen.
Align your traced rectangle corners with the bottom of the rectangle still visible on your screen. If you traced a grainline, this line will also help you align the pattern piece. Tape.
Extend your tracing surface by taping another piece of paper on to the original tracing piece.
Keep tracing until you have traced the entire pattern piece.
After completing the tracing, I like to reinforce the tape seams on my traced pattern piece. I usually end up with a patchwork of paper at the end of the tracing process. If you find the traced pattern piece flimsy, you can also trace a clean version off of your patchwork paper.
General Tips:

Label all of your pieces right after removing the traced paper from the screen. This will help you keep track of what has been traced so far, as well as which side of the pattern is the front.
I like to cut out the pattern piece once I am done tracing, and use the leftover scrap pieces of paper for tracing other pieces.
To grade between sizes, I will trace the nested lines of multiple sizes and grade after I am done tracing.
Make sure that you aren’t accidentally adjusting the zoom % value when scrolling down the page. This will ruin your Actual Size measurement, and you will end up with incorrectly scaled pattern pieces. I like to write down the Actual Size percent in case this happens so I can easily reset the zoom %.
These days, I mostly use digital sewing patterns and trace the patterns off of my monitor. I occasionally purchase print patterns for coats, because the quantity of large pattern pieces in a coat would be time consuming to trace.
If tracing a sewing pattern off your monitor isn’t for you, and you would like to work with a printed digital pattern, I recommend searching for a local print shop in your area to print your patterns. You can search for “large format printing” “copy shop” or “engineering prints” to find a copy shop that will print out your digital pattern. These shops usually provide quick service for large format black and white printing.